This forum is preserved as a permanent archive. The community continues at eMedia Press.

Announcement

Collapse
No announcement yet.

Muller generator replication by Romerouk

Collapse
X
 
  • Filter
  • Time
  • Show
Clear All
new posts

  • toranarod
    replied
    this is bit better

    I added a third globe and increased the current draw.
    here are the results for today.

    i need to make a better coil.

    Leave a comment:


  • Joit
    replied
    Muller Research

    -The generator contains an odd-number/even-number configuration of poles/magnets so that a magnetic balance occurs which eliminates the work required to move one pole from the other no matter how large or strong the magnetic surface would be. This concept allows the flywheel to turn easily and efficiently despite the inherent powerful holding force of the magnets.

    The rotor of the Muller R&D model contains 16 NdFeB permanent magnets which are set 22.5 degrees apart and the stator contains 15 field coils which are set approximately 24 degrees apart.

    The rotor is turned by a motor, such as a diesel engine or a windmill. As the rotor magnets revolve past the coils, the magnetic field induces a pulsating electrical current which can be used for any purpose. However, first the generated electricity must flow through a solid state switching circuit (which is not shown).

    -Operational Characteristics Of The Muller Dynamo As A Motor

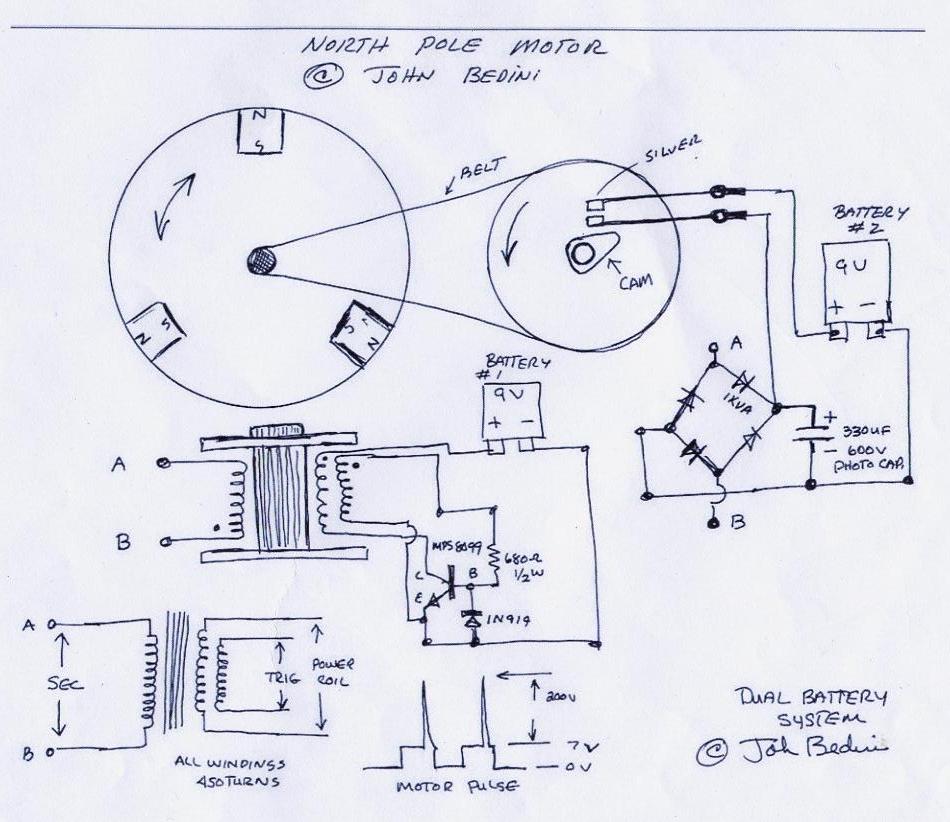
    The Muller Dynamo Motor operates by a DC pulse gated through a pulse timing module.
    A DC power source impulses selected stator coils. This electrical input then momentarily becomes an expanding magnetic field for the duration of a specified pulse width.

    The power through the stator coils are carefully timed and phased to repel the magnet and create the motive force. The magnets can be sensed by a Hall Effect Sensor or by Optical Encoding or by a special sensing coil in order to turn on the pulse at the correct time for the proper impulse stator coil.

    The sensing signal turns on a power MOSFET (transistor) to allow the DC power to flow into the impulse stator coil to create the expanding magnetic field. The expanding magnetic field around the impulse stator coil repels the magnet which is adjacent to it and propels the rotor shaft around and around.

    The on-time of the pulse at higher speeds becomes very small, thus using less energy per impulse at the same time the generator coils are generating electricity.

    We are able to return this electricity back into the original power source. By the clever use of diodes we can direct the collapsing field back into the battery or back on the main power rail or back into another battery or a discharge capacitor.

    By hammering every second magnet, we have every other magnet serving as a generator and this energy being generated can be directed by the same diodes such that any Back EMF or Voltage Spike (Inductive Kick-back) is recaptured by any suitable storage medium.

    The output on the coils will vary as to the size and type of core, the number of turns of wire, the size of the wire and the frequency of the impulse.

    Leave a comment:


  • Slider2732
    replied
    Great demo, enjoyed watching it. That's a serious amount of power being shown !

    Leave a comment:


  • toranarod
    replied
    Originally posted by yx630514 View Post
    Hi toranarod:
    Please tell me you use energy-saving lamp type,
    AC or DC?
    How much power? How much voltage?
    I use 12V/5W incandescent bulbs appropriate?
    Your explanation seems more appropriate for high-voltage load.

    Thank you!
    Hello yx630514

    I made a quick Video I hope this helps
    good luck


    YouTube - ‪Pulse Motor 7 strand Litz coil lighting 2 CFL globes‬‏

    Leave a comment:


  • yx630514
    replied
    Load type?

    Hi toranarod:
    Please tell me you use energy-saving lamp type,
    AC or DC?
    How much power? How much voltage?
    I use 12V/5W incandescent bulbs appropriate?
    Your explanation seems more appropriate for high-voltage load.

    Thank you!

    Leave a comment:


  • toranarod
    replied
    Originally posted by yx630514 View Post
    Very much - thanks Slider2732 and toranarod response.
    Because my English is not good, For your response can only be roughly understand, I understand the main point is:

    1) driver/generation coil position is very important, To get the rotor acceleration, Driver/generation coil requires relatively rotor magnet: front, back, left, and right adjustment.

    2)The load resistance value is very important, need to adjust the size of the load resistance value and driver/generation coils coincide.

    3) drive/generation coil completely do not need parallel capacitor.

    My understanding correct? Please help me confirm.

    PS1: @ Slider2732
    How to achieve "At whatever voltage, the rotor will turn at exactly the same speed"?

    PS2: @ toranarod
    According to your current research, You are very likely to become millionaires.

    I think you have the idea
    keeps us informed

    well done

    Leave a comment:


  • toranarod
    replied
    Originally posted by Slider2732 View Post
    Chiming is good, it's given me a simple peak dumps implementation idea, whereas before I was quite stuck for a dynamically alterable automatic cap dump method

    Bit of conjecture, just some thoughts, but relating to these coils:
    In the Romero vids we see the rotor spin up to different speeds with different DC regulator settings. Especially the automatic recalibrations as voltages change. The system self sets up. For the system to work properly, the rotor speed has to be allowed to increase when the regulator settings go up...we are seeing a redistribution, though it all looked very magical when he notched up the voltage on the regulator and the batteryless system increased in speed. The fact may well be, that what we have is a system that would run much faster without the DC to DC converter, accelerating up to the Hall sensors switching speed ability. So every setting below full generator output ability is in fact a limiter of output ability. Or you could say that higher voltage settings allow the system to breathe more.
    Perfectly aligned driver coils (speed up under load) need to sit in the system along with constant speed coils...the effect of same speed rotation allows the load to be applied, with no slow down in rotor speed. When energies dip below the abilities of the same speed coils, the speed up coils naturally take on a larger and larger percentage of running because they are not being drained..replacing the speed loss, to again balance. If a load is applied, which can in fact be in the form of a voltage limit below the full output of the system, the system coils re-equate, leading to the effect of a speed change from the speed up coils. Changes upset the balance and allow the speed up effect coils to actually perform the recalibration. The regulator will get very hot at anywhere below the reported 15V output of the system, trying to dump out extra generated energy...which we see, by Romero often touching the casing of the regulator.
    The thing is, that because of the automatic calibration, the system always puts out 15V, the speed needed to do so is where we see from recent experiments the same speed rotation..the same output availability of generator coils.
    Without the regulator in place, once triggered, the speed up coils would want to accelerate and keep on accelerating, which I believe was Romero's runaway condition, before the regulator was fitted to his design..
    It's not that it can output from 3V up to 12V on the DC/DC regulator, it's the other way around, it's not being allowed to run at 15V.

    thanks Gyula. this is helpful
    interesting explanation Slider. I have so many mew ideas what to test next?

    Leave a comment:


  • Slider2732
    replied
    Chiming is good, it's given me a simple peak dumps implementation idea, whereas before I was quite stuck for a dynamically alterable automatic cap dump method

    Bit of conjecture, just some thoughts, but relating to these coils:
    In the Romero vids we see the rotor spin up to different speeds with different DC regulator settings. Especially the automatic recalibrations as voltages change. The system self sets up. For the system to work properly, the rotor speed has to be allowed to increase when the regulator settings go up...we are seeing a redistribution, though it all looked very magical when he notched up the voltage on the regulator and the batteryless system increased in speed. The fact may well be, that what we have is a system that would run much faster without the DC to DC converter, accelerating up to the Hall sensors switching speed ability. So every setting below full generator output ability is in fact a limiter of output ability. Or you could say that higher voltage settings allow the system to breathe more.
    Perfectly aligned driver coils (speed up under load) need to sit in the system along with constant speed coils...the effect of same speed rotation allows the load to be applied, with no slow down in rotor speed. When energies dip below the abilities of the same speed coils, the speed up coils naturally take on a larger and larger percentage of running because they are not being drained..replacing the speed loss, to again balance. If a load is applied, which can in fact be in the form of a voltage limit below the full output of the system, the system coils re-equate, leading to the effect of a speed change from the speed up coils. Changes upset the balance and allow the speed up effect coils to actually perform the recalibration. The regulator will get very hot at anywhere below the reported 15V output of the system, trying to dump out extra generated energy...which we see, by Romero often touching the casing of the regulator.
    The thing is, that because of the automatic calibration, the system always puts out 15V, the speed needed to do so is where we see from recent experiments the same speed rotation..the same output availability of generator coils.
    Without the regulator in place, once triggered, the speed up coils would want to accelerate and keep on accelerating, which I believe was Romero's runaway condition, before the regulator was fitted to his design..
    It's not that it can output from 3V up to 12V on the DC/DC regulator, it's the other way around, it's not being allowed to run at 15V.

    Leave a comment:


  • gyula
    replied
    Hi Rod,

    I think this schematic shows how erfinder thought:


    A mechanical switch is shown, either a p-channel MOSFET switch in the positive battery line or an n-channel in the negative line could be used. In your case the load is the bulb, not a battery of course.

    Timing is important for the switch: when the puffer capacitor receives charge the switch must be off, and then it can be switched on with a preferably variable duty cycle till the next charging cycle begins.

    Sorry to chime in...

    Gyula

    Leave a comment:


  • toranarod
    replied
    Originally posted by erfinder View Post
    toranarod,

    Could you please clarify why you are placing the load across the capacitor in dead short fashion versus pulsing the capcitor out thorough the load?

    Regards
    OK good Idea

    I will reconfigure this for tomorrows. Just so I relay understand.
    draw a quick diagram please. I just want to be sure get where you are coming from. Will test this and post data thank you.

    Leave a comment:


  • erfinder
    replied
    toranarod,

    Could you please clarify why you are placing the load across the capacitor in dead short fashion versus pulsing the capcitor out thorough the load?

    Regards

    Leave a comment:


  • toranarod
    replied
    Originally posted by Slider2732 View Post
    @yx - What I have found, is that the 7 strand coils will run the motor at a fixed speed, a speed that always stays the same. If you start the motor at 6V, you can change the input voltage down to 3V and the rotor will stay at the same speed, change it up to 12V and it will also be the same. As you know, most motors will speed up with more voltage and slow down with less, so this is very different.
    Also, the coil may be able to be positioned at any point you wish around the rotor and the motor will run...most motors need the coil to be in one exact place to work at all.
    So, if you see those things, then the driving circuit should allow you to also experience the large increase in speed, when you set the coil at exactly the right place.
    I might be wrong and another type of circuit may behave differently, but they are my findings so far
    Here's my example video of running at the same speed, which I hope helps:
    YouTube - ‪Romero coil, solid rotor speed 3V-12V, anywhere !‬‏
    And placing the coil anywhere around the rotor (powered by a thyristor in this video):
    YouTube - ‪Coil anywhere, motor keeps on running‬‏

    Hello Slider
    Your coil ideas have opened up a few possibilities I would not have looked at.
    The 7 strand Litz coil and the technique of separating and splicing the wires together have led me to look at some interesting ideas.
    Great post Slider.
    The coil is more effective and efficient than any other I have tried.
    The question is how can this coil be improved on?

    Here is the data on a 75 volt supply. Better but not as good as I would have hoped.
    More test tomorrow I will increase the number of lamps on the circuit.

    Leave a comment:


  • Slider2732
    replied
    @yx - What I have found, is that the 7 strand coils will run the motor at a fixed speed, a speed that always stays the same. If you start the motor at 6V, you can change the input voltage down to 3V and the rotor will stay at the same speed, change it up to 12V and it will also be the same. As you know, most motors will speed up with more voltage and slow down with less, so this is very different.
    Also, the coil may be able to be positioned at any point you wish around the rotor and the motor will run...most motors need the coil to be in one exact place to work at all.
    So, if you see those things, then the driving circuit should allow you to also experience the large increase in speed, when you set the coil at exactly the right place.
    I might be wrong and another type of circuit may behave differently, but they are my findings so far
    Here's my example video of running at the same speed, which I hope helps:
    YouTube - ‪Romero coil, solid rotor speed 3V-12V, anywhere !‬‏
    And placing the coil anywhere around the rotor (powered by a thyristor in this video):
    YouTube - ‪Coil anywhere, motor keeps on running‬‏

    Leave a comment:


  • yx630514
    replied
    Very much - thanks Slider2732 and toranarod response.
    Because my English is not good, For your response can only be roughly understand, I understand the main point is:

    1) driver/generation coil position is very important, To get the rotor acceleration, Driver/generation coil requires relatively rotor magnet: front, back, left, and right adjustment.

    2)The load resistance value is very important, need to adjust the size of the load resistance value and driver/generation coils coincide.

    3) drive/generation coil completely do not need parallel capacitor.

    My understanding correct? Please help me confirm.

    PS1: @ Slider2732
    How to achieve "At whatever voltage, the rotor will turn at exactly the same speed"?

    PS2: @ toranarod
    According to your current research, You are very likely to become millionaires.
    Last edited by yx630514; 07-10-2011, 06:22 AM.

    Leave a comment:


  • toranarod
    replied
    Originally posted by Shadesz View Post
    I don't know. Looks kinda scammy to me. Notice how the led's light up before the unit is spinning?
    Fixed magnet motors. Any body that has every calmed to have created one of them has never publish HOW.
    Unless they document in full detail how. it is not worth worrying about.
    That's was what made Romero UK motor a first. It came with full disclosure. same old same old. look what I have done I am going to be A millionaire LOL

    Leave a comment:

Working...
X