 Tweet
Tweet
Slanted 12 Pole
@UFO
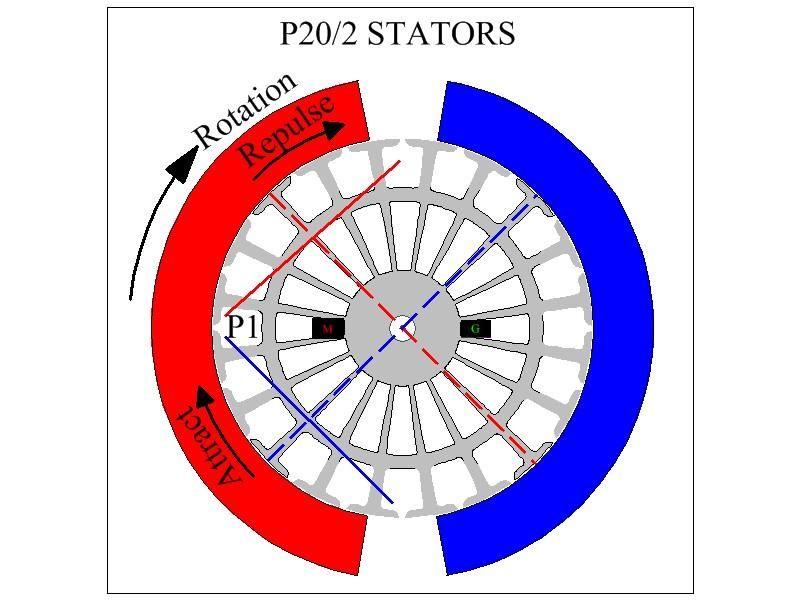
I do not remember all the comments made before but I found some 12 Pole 2 brush motors @24 volts that are real nice. After taking them apart and starting to put the second comm on the shaft a mental problem crossed my mind. The rotor has slanted slots from one comm to the other making the end of the slot aligning with the next beginning slot. Q: do you wind the coil to match the exact opposite comm or do you wind the coil to match the same pole ending position comm? or do you just align the brushes so both ends of the coil are connected regardless of what brush position you use?
PS: In the past I did not have to think about this issue, all of the conversions I have done so far have had straight armature slots.
@UFO
I do not remember all the comments made before but I found some 12 Pole 2 brush motors @24 volts that are real nice. After taking them apart and starting to put the second comm on the shaft a mental problem crossed my mind. The rotor has slanted slots from one comm to the other making the end of the slot aligning with the next beginning slot. Q: do you wind the coil to match the exact opposite comm or do you wind the coil to match the same pole ending position comm? or do you just align the brushes so both ends of the coil are connected regardless of what brush position you use?
PS: In the past I did not have to think about this issue, all of the conversions I have done so far have had straight armature slots.


 ...But what am concern wires would come out loose and short galore within machine.
 I now keep coming back every few weeks or so to check on things. I'm just wondering what's the most promising results we've had so far? Any real proof of OU yet? I understand these things take time
Comment