Announcement

Collapse
No announcement yet.

My Asymmetric Electrodynamic Machines

Collapse
X
 
  • Filter
  • Time
  • Show
Clear All
new posts

  • wow johnstone!

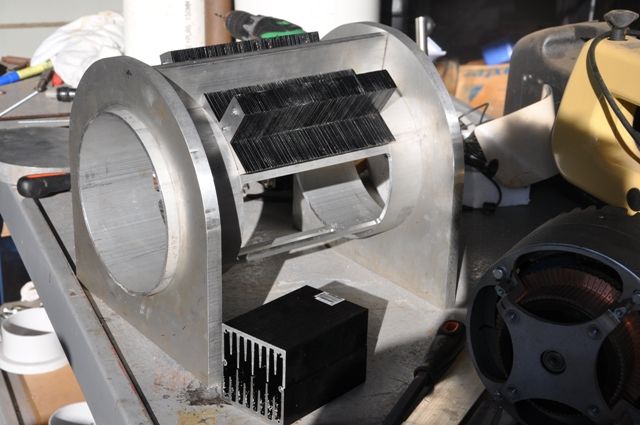
    Thank you for all your hard work, it looks very professional and will be a huge help in replicating these motors. Ive found with my asymmetric RS motor (dual pentagons) that the radiant output is much better if I pulse it...to put it into other terms i have 2 capacitors across the input...now my motor was not centered perfectly so when i turn it on it jolts to one side and will sometimes take some of the wires off the brush and lower in RPM. Ive found that when the capacitors are charged, and there is a spark discharge into the next coil when i turn it by hand....the radiant output is still there bright and clear even when the motor doesn't turn. I think this is because the coils on the generator side are in the proximity of the coil being pulsed. I also think this must mean there is more radiant to be tapped into, as the other coils are probably also producing it as well. Timing is very important on both input and output side. SO is pulsing. Learning a lot first hand and I really appreciate all you contributing. I constantly keep up with the forum, you guys are great teachers and experimenters!

    Warren

    Comment


    • MAG 3 Coming along...

      Originally posted by Cornboy 555 View Post
      @ cornboy, How's mag3 coming?

      Hello Machine, and all, well had a couple of setbacks, one was not in my control.

      Had 12" rain in 24 hrs and flash flooded the farm, it was in drought till then, so now i am madly trying to follow moisture with Corn and Soybeans. which should have been planted months ago but too dry.


      The other was i actually bent the 25mm mild steel shaft pressing it through rotor laminations so had to make new one from high tensile.

      Just starting to get housing etc to stage of making sure everything will fit, but am delayed some.

      Regards

      Cornboy.

      PS. @ John Stone, the heatsink in pic is what i will use for Pulser, a 80mm fan screws straight onto end.

      Hello Cornboy,

      Wow, that Housing looks impressive my friend!

      [IMG][/IMG]

      Are You going to hook Stators with an "E" Bracket from Stators to Frame?...In order they could be taken on-off from outside embodiment?

      Also, figure out to open Ventilation holes on both brush commutators sides and End caps...as, also, if you could fit Dual Fans on each end will be awesome...

      Later on you could add a mesh or grille on holes...to avoid from objects to fall in commutation-brush area...

      Edit 1: I see at right lower of Picture...the Commutators and end Cap-Housing...is that to be mounted on top of this Stator Housing?...looks awesome!

      I can only Imagine that Beauty spinning with a Three-Six Channel John Stone Controller Design...

      You are going to have a lot of fun with that machine there!!


      Sorry about your flooding my friend...but at same token...is better than dry/dessert like times...no harvest then...right?


      Regards


      Ufopolitics

      P.D: On Shaft pressing to Core Laminations...

      Make sure you make before, on shaft ...some splines...that will stick out more -just a bit more- than shaft surface...and shaft diameter versus Rotor laminations hole, being "easier" to insert into...meaning, your splines will be the ones to lock onto laminations...

      Imperial have those splines on Shaft...that run all the way to commutators...I show them in my First Video of Winding Asymmetrical this Imperial...as I use them for guides, to set-press commutators on...
      Last edited by Ufopolitics; 02-03-2013, 07:43 PM.
      Principles for the Development of a Complete Mind: Study the science of art. Study the art of science. Develop your senses- especially learn how to see. Realize that everything connects to everything else.― Leonardo da Vinci

      Comment


      • Originally posted by Ufopolitics View Post
        Hello Cornboy,

        Wow, that Housing looks impressive my friend!

        [IMG][/IMG]

        Are You going to hook Stators with an "E" Bracket from Stators to Frame?...In order they could be taken on-off from outside embodiment?

        Also, figure out to open Ventilation holes on both brush commutators sides and End caps...as, also, if you could fit Dual Fans on each end will be awesome...

        Later on you could add a mesh or grille on holes...to avoid from objects to fall in commutation-brush area...

        Edit 1: I see at right lower of Picture...the Commutators and end Cap-Housing...is that to be mounted on top of this Stator Housing?...looks awesome!

        I can only Imagine that Beauty spinning with a Three-Six Channel John Stone Controller Design...

        You are going to have a lot of fun with that machine there!!


        Sorry about your flooding my friend...but at same token...is better than dry/dessert like times...no harvest then...right?


        Regards


        Ufopolitics

        P.D: On Shaft pressing to Core Laminations...

        Make sure you make before, on shaft ...some splines...that will stick out more -just a bit more- than shaft surface...and shaft diameter versus Rotor laminations hole, being "easier" to insert into...meaning, your splines will be the ones to lock onto laminations...

        Imperial have those splines on Shaft...that run all the way to commutators...I show them in my First Video of Winding Asymmetrical this Imperial...as I use them for guides, to set-press commutators on...


        Hello UFO and all, still mulling over which way to fix stator cores to housing, they lock in on taper edges and just require clamping, it will be great to have the ability to remove them easily. I'm not sure if i will require clamping of copper windings as well, to clamp against repulsion of windings themselves.

        The whole stator assy is designed to fit neatly into a 300mm pvc housing so down the track i can fit fine wire coils on outside to gather stray flux if possible or needed.

        I will be slotting the housing at ends on 200mm dia tube for look see, and to exit adjustment rods for timing of input and output brush plates, which will be seperatly adjustable for tuning.

        Fans if needed i can attach externally.

        @UFO , sorry for confusion, the commutator and housing at bottom right, shouldn't be in pic, it is the end of a 18kw short circuit motor i was going to fit to one of my farm ATV's a couple of years ago, which started me on my quest to build a heavy duty onboard battery charging system to sustain it, hence the plastic motors/chargers i have shown.

        Of course, i started at the wrong end, should have looked at more efficent traction motor, like now, but had to start the learning curve somewhere, and you can't buy the learning i have had so far at any university for any price!

        Yep, UFO i will have extreme fun with this machine and can't wait to share it with you all.

        @ Pressing in shaft, i put splining on with cole chisel, gently, but was lazy when needed to use spacer on shaft to relax ram for final 5mm, ran out of ram stroke travel, used spacer that was hollow and soft and it tilted slightly sideways, and at 10,000 PSI the 25mm shaft bent like it was made from playdough.

        Old farmer's saying, "you can't make money out of dust, but you can always make money from mud".

        Will keep plodding on, Cornboy.
        Last edited by Cornboy 555; 02-03-2013, 08:53 PM.

        Comment


        • is there a need for a HAAS cnc machine in order to custom build these motor/generators? instead of rewiring old tired generators? i have access to a machine shop but i dont understand the windings. maybe we can trade parts where i machine the parts for free n i get the winding. this way we can come together n build cnc`d generators from aluminum if thats best

          Comment


          • Hi friends,
            still working on pulser documentation. This day I had less time left. My wife supports me emphatically and she is one of my focus points as well

            Some tutorial stuff added today and some hints and pics.

            I want to add soon:
            • Some pics of exemplary FET wiring - but I need to build it first.
            • BOM along explanations
            • Links to data sheets
            • Some sources and prices for essential components

            JohnS
            Experts spend hours a day in order to question their doing while others stopped thinking feeling they were professionals.

            Comment


            • Thanks.

              Thanks John Stone,

              Warm Regards Cornboy.

              Comment


              • Hello everyone,

                @UFO
                A simple Question: Do you have Opto's between MOSFET's Gates and 12 V Input Signal?...Or are Your FET's Directly Resistor Driven?

                That is a key there...because If they go bad by shorting 12V Positive Gate to Drain...and you have a common ground, not isolated...then you will get closer to 48 Volts...
                I was not using opto's, and that would make alot of sense, but we'll see.
                If that is what happened, at least we know that energizing p1-p15 with 48v, puts her up to 9000 RPM.

                Comment


                • Originally posted by JohnStone View Post
                  Hi friends,
                  still working on pulser documentation. This day I had less time left. My wife supports me emphatically and she is one of my focus points as well

                  Some tutorial stuff added today and some hints and pics.

                  I want to add soon:
                  • Some pics of exemplary FET wiring - but I need to build it first.
                  • BOM along explanations
                  • Links to data sheets
                  • Some sources and prices for essential components

                  JohnS
                  Hi Johnstone,
                  Sounds like a great wife.
                  I couldn't find a couple indicated parts at farnell.
                  So if you can make the list that would be great.
                  I hope to modify a couple treadmill motors and will be making your pulser.
                  Then on to Imperial-dom.
                  bro d

                  Comment


                  • Hi John Stone,

                    Do these seem alright to you?

                    http://www.infineon.com/dgdl/IPW60R0...27f24dd83c3c09

                    I can get them for this price from my China connection.

                    Probobly less in bulk.

                    IPW60R041C6 INFINEON 10PCS TO-247 $2.00 (unit price:US dollar)

                    $9.76 otherwise at Farnell, (Newark in US)

                    MOSFET, N CH, 650V, 77.5A, TO-247-3
                    Transistor Polarity: N Channel
                    Continuous Drain Current Id: 77.5A
                    Drain Source Voltage Vds: 650V
                    On Resistance Rds(on): 0.037ohm
                    Rds(on) Test Voltage Vgs: 10V
                    Threshold Voltage Vgs Typ: 3V
                    RoHS Compliant: Yes

                    "We on the winnin team"

                    bro d
                    Last edited by Donald Haas; 02-04-2013, 03:26 PM.

                    Comment


                    • Originally posted by esesenergy View Post
                      is there a need for a HAAS cnc machine in order to custom build these motor/generators? instead of rewiring old tired generators? i have access to a machine shop but i dont understand the windings. maybe we can trade parts where i machine the parts for free n i get the winding. this way we can come together n build cnc`d generators from aluminum if thats best
                      Hi esesenergy,
                      If you build a small one (I recommend Electronic Goldmine 12v massive motor) you will have basic understanding of windings and motor design.

                      If you can CNC motor parts then next is motor design for desired application.

                      Cornboy is going through the whole process from scratch.

                      As long as you continue to display lack of the most basic knowledge of these motors and the modifications of off the shelf motors, then there is no connection.

                      For a motor/gen combo of any size one must be able to trouble shoot windings, brush alignment, pulser circuit and what ever else is suspect.

                      Builders on this group are ALL doing these things.

                      Your welcome to join in.

                      bro d

                      Comment


                      • Originally posted by Donald Haas View Post
                        Hi John Stone,
                        Do these seem alright to you?
                        http://www.infineon.com/dgdl/IPW60R0...27f24dd83c3c09
                        I can get them for this price from my China connection.
                        Probobly less in bulk.
                        IPW60R041C6 INFINEON 10PCS TO-247 $2.00 (unit price:US dollar)
                        $9.76 otherwise at Farnell, (Newark in US)

                        MOSFET, N CH, 650V, 77.5A, TO-247-3
                        Transistor Polarity: N Channel
                        Continuous Drain Current Id: 77.5A
                        Drain Source Voltage Vds: 650V
                        On Resistance Rds(on): 0.037ohm
                        Rds(on) Test Voltage Vgs: 10V
                        Threshold Voltage Vgs Typ: 3V
                        RoHS Compliant: Yes
                        "We on the winnin team"
                        bro d
                        Wow! MAN! That is a new one! Thanks for hint. It is even better than my personal choice. Great find!

                        You will get:
                        • 650 V pulsed (600V continuous)...........................I recommend 400V minimum
                        • 72A @25°C (49A@150°C) countinuous..........thats great
                        • 272A @25°C (150A@150°C) short pulses.......dto.
                        • 41 mOhm @44A & 25°C (doubles for 100A and doubles again for 150°C = 169 mOhm)
                          .................................................. .........................I recommend less than 70mOhm minimum
                        • 10ns rise time.............................................. ......I recommend less than 80ns
                        • 7ns fall time.......................................I recommend less than 50ns (7ns! -> that's the sound SHE likes !!! Tease her soon!)


                        - I listed derating parameters above (bold) in order to urge you not to look at maximum ratings only! Those deratings are typical for all MOSFETs. As IPW60R041C6 peforms extremely good you can imagine how lousy those medium types are in reality. I hope you understand why some FETs get burned soon
                        - Do not let you fool by Ugs 3.5V (it is for switching 2mA!) We need 10 V minumum = 15V...20V drive.
                        - We need GOOD cooling at heavy load in order to avoid deratings!
                        - The gate capacitance is about six times a normal FET. No chance to drive it with 555 or simple transistors. Fortunately we have a monster driver in our drawer with 12A driver chip I hope you all understand why I urge you to have massive and SHORT wires. It is no other way in order to shoot and retract 12A within ns to the gate! Fortunately I just reworked my layout of monster driver in order to shorten the wires between driver and gates. I beg SHE likes it!
                        - Prepare something like this setup.

                        The copper rails are rated for 80A continuous current @10" length. They are used for connecting the houshold fuses at input side. The monster driver will be connected short way to gates and souce rail (top one). Excuse the poor soldering. It is just is sample for you ALL for demonstration purpose.


                        Farnell: 12.37€ for one (11.25 for 10)
                        Mouser: 17.16$ (15.59 for 10)
                        Digikey: 10.31€ (9.39€ for 10)
                        Adding VAT to those prices.
                        Furher sellers at octopart (Thanks IndianyBoys for posting this link)

                        For 7ns it is a good price. It is like buying tangas - less fabric to it -> higher price.
                        Your price is incredibly - you lucky devil! - buy!!!!! those tangas for HER! No idea on how you will explain it to your wife.
                        JohnS
                        Last edited by JohnStone; 02-04-2013, 10:42 PM.
                        Experts spend hours a day in order to question their doing while others stopped thinking feeling they were professionals.

                        Comment


                        • Originally posted by Lester444 View Post
                          @Machinealive,
                          I don't really understand how those caps should be connected. I don't have generator brushes installed yet so could not connect the caps as you show in your diagram. If you meant bypass caps right across the power supply (but close to the driver) then yes I can try those immy.

                          @JohnS,
                          Sorry for the confusion. I am actually using a circuit link posted by Machinealive earlier, with some modifications. Here's the actual circuit I used (IRF740 = 4x). This works for me because the motor I'm driving is small. I already had some IRF740 in hand and I put them in parallel to minimize RDSon. Cooler FETs, less voltage loss due to current. I do have 100nF caps very close to the IC pins. I still have to add C5 and another 100nF near the transistors.

                          Lester

                          Hi Lester,
                          Been building this cct and I'm seeing very little voltage, .0041vdc from #1 pin of 393.
                          I havn't put the transistors on because it seems that I should see a good sq wave and more voltage. The scope shows that the duty cycle and frequency adjustments are working but the sq wave is not there.
                          I have to expand it severely to see it on the scope due to very low voltage.
                          I'm seeing 6+vdc out of timer and nice ST wave.
                          Am I mising something?

                          We are all very glad to see you into building. Outstanding skills!!

                          Thanks,

                          bro d
                          Last edited by Donald Haas; 02-04-2013, 11:29 PM.

                          Comment


                          • Direct?.

                            Originally posted by Donald Haas View Post
                            Hi John Stone,

                            Do these seem alright to you?

                            http://www.infineon.com/dgdl/IPW60R0...27f24dd83c3c09

                            I can get them for this price from my China connection.

                            Probobly less in bulk.

                            IPW60R041C6 INFINEON 10PCS TO-247 $2.00 (unit price:US dollar)

                            $9.76 otherwise at Farnell, (Newark in US)

                            MOSFET, N CH, 650V, 77.5A, TO-247-3
                            Transistor Polarity: N Channel
                            Continuous Drain Current Id: 77.5A
                            Drain Source Voltage Vds: 650V
                            On Resistance Rds(on): 0.037ohm
                            Rds(on) Test Voltage Vgs: 10V
                            Threshold Voltage Vgs Typ: 3V
                            RoHS Compliant: Yes

                            "We on the winnin team"

                            bro d


                            Hello Donald, great specs, can we buy direct from your supplier?
                            Can i buy bulk direct from you?

                            Regards Cornboy.
                            Last edited by Cornboy 555; 02-04-2013, 11:55 PM.

                            Comment


                            • Originally posted by Cornboy 555 View Post
                              Hello Donald, great specs, can we buy direct from your supplier?
                              Can i buy bulk direct from you?

                              Regards Cornboy.
                              Hi Cornboy,
                              I'm waiting to hear from supplier.
                              Will let you know ASAP.
                              bro d

                              Comment


                              • Donald
                                Initially, there should be little voltage out of 393 but should be more than that. I would first go back thru the circuit and see where you are loosing voltage. What is the voltage of battery? Check all resistors and such. Once you find that and get more out of 393 then try changing that 2.2K resistor from Positive feed to pin one of 393 to a lower resistance. That is the pull up resistor and if it is set at 1K should bring a 12 volt system up up to 12 volts on pin one. If you are using a lesser voltage you will have to test to find the correct pull up size. Overall, I suspect that the problem is farther back in your circuit or too low voltage to start with. The 555 should have 5 volts and the 393 12volts but all is well with total of 12 to that point. Also make sure that you have not tied C3 to pin one as that would pull it all to 0-Volts.
                                Dana
                                Last edited by prochiro; 02-05-2013, 01:35 AM. Reason: edit
                                "Today's scientist have substituted mathematics for experiments and they wander off through equation after equation and eventually build a structure which has no relation to reality."
                                Nikola Tesla

                                Comment

                                Working...
                                X